Introduction
Kubernetes is a cornerstone for the development of microservices SaaS and cloud-native software. Microservices necessarily need container technology and container orchestration since their architecture usually addresses a large number of containers.
In this context, the Kubernetes dashboard is the best way to control and monitor your clusters and working containers in an appropriate UI via the internet browser.
This guide will focus on launching the Kubernetes dashboard on the Internet browser inside the Windows environment. Most of these steps aren’t different if you need to access it via Linux. However, as a Linux user, you will find it easier. But Windows users need help regarding Docker and Kubernetes issues.
Installing Docker and Enabling Kubernetes
To install Kubernetes, It’s obvious you must first install Docker. However, you don’t need to install Kubernetes since it just needs enabling from Docker settings.
The well-known prerequisites for installing Docker for Windows include:
- Enabling hyper virtualization or hyper v permits your system to create and run virtual machine software and containers.
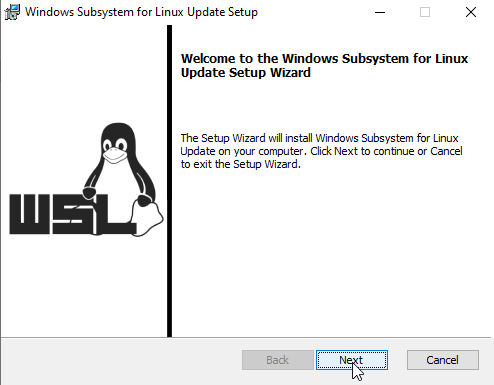
- Install WSL 2 Windows Subsystem for Linux.
Download and install docker desktop for windows from the Docker installer. After finishing, restart your system and launch the docker desktop.
If you have not already installed Windows Subsystem for Linux, you will see a message telling you that WSL 2 installation is incomplete. So you need to make sure to install it properly at first.
Restart running Docker, and you should see that the docker engine is running on the bottom-left side of the docker window.

Run the command prompt as an administrator, check that Docker is running using this command:
$ docker version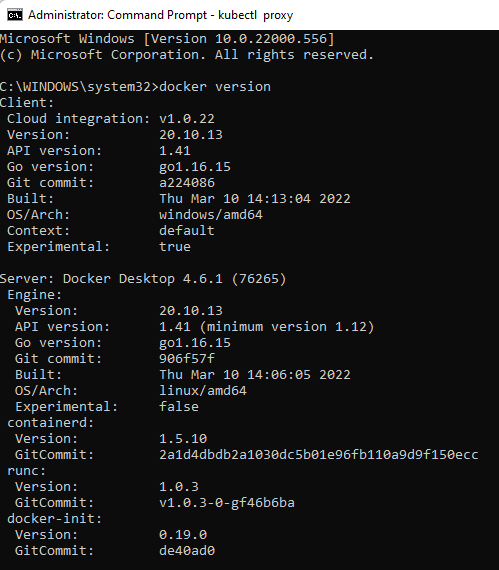
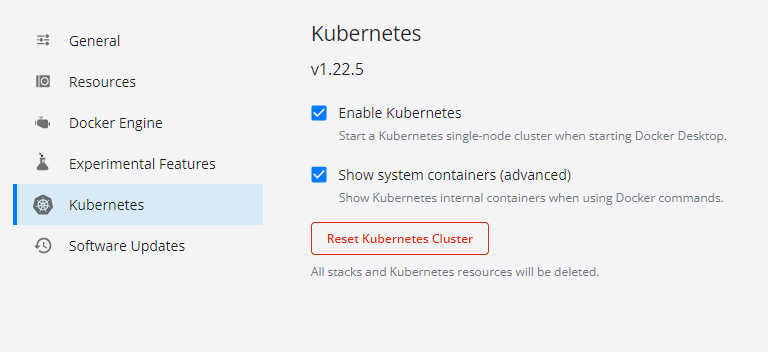
Enable Kubernetes from Docker settings as in the below image. Also, check the Show system containers (advanced) option. Then, click on the Apply & Restart button.
If everything has gone right, you can see that both Docker and Kubernetes are running.
Also, you can check that Kubernetes is running from the CMD:
$ Kubectl version
Notice that you have both client and server versions, which means you get access to the Kubernetes cluster.
Now it’s time to make a docker user ID or account. Create a new Docker account from this link, and log in to it on your Docker desktop. You should see at your Docker desktop status bar that you are logged in. Also, check on the docker-desktop option to ensure you can access Kubernetes from the desktop.

From the command prompt, run this Kubernetes command to access and check Kubernetes pods:
$ Kubectl get pods
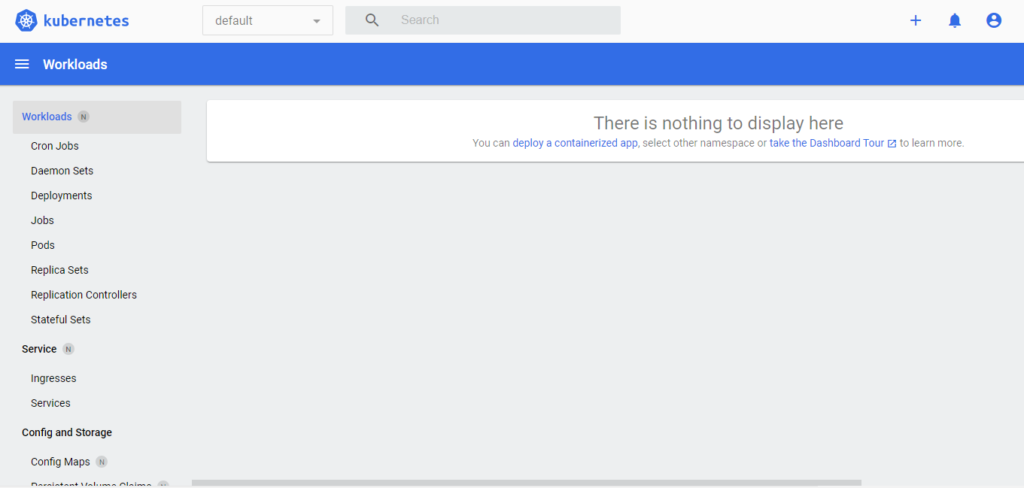
The result says “no resources…” because it’s a new installation.
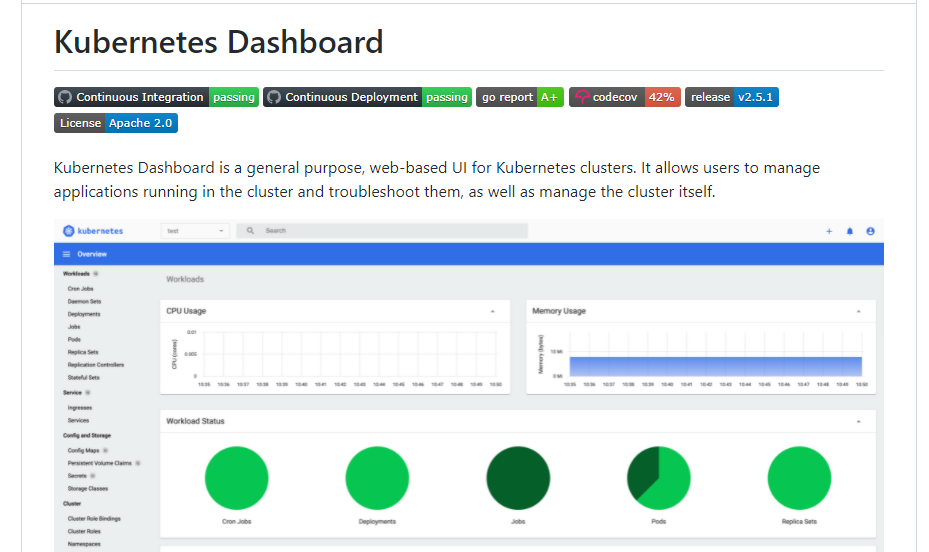
Our goal is to get a UI version of the Kubernetes dashboard to monitor and manage clusters easily. Unfortunately, it’s not available by default, but we can install it through some common steps.
Log in to your Docker web page account from a browser:

Write "kubernetesui/dashboard" in the search box, or go to this link.
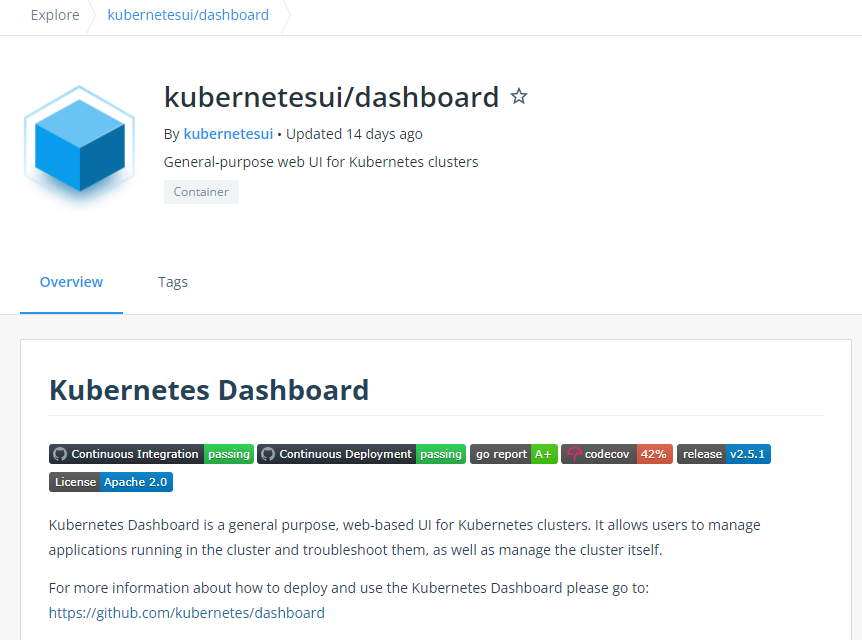
Now go to this link to get some instructions about deploying and using it.
Below, there are the instructions to access the Dashboard:
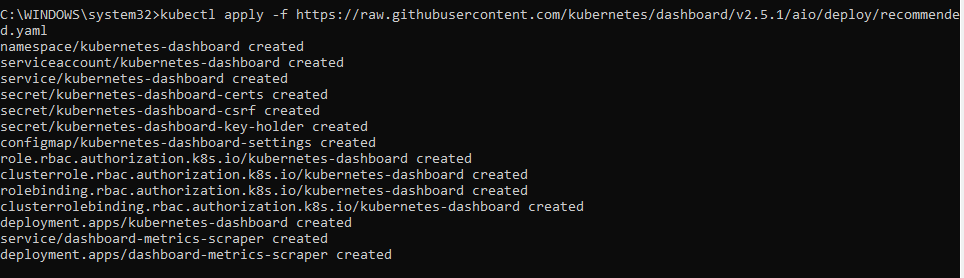
You will deploy (install) the Dashboard via running this command in the command prompt:
$ kubectl apply -f https://raw.githubusercontent.com/kubernetes/dashboard/v2.5.1/aio/deploy/recommended.yamlIt’s running a YAML file instructions to install the Kubernetes dashboard image. The command results will show you that the Dashboard has been installed, like this:
Now you can start running the Dashboard in the background by this command to start the kubectl proxy:
$ kubectl proxy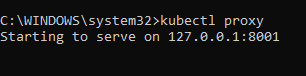
You need to keep this command prompt window open to keep the Dashboard running.
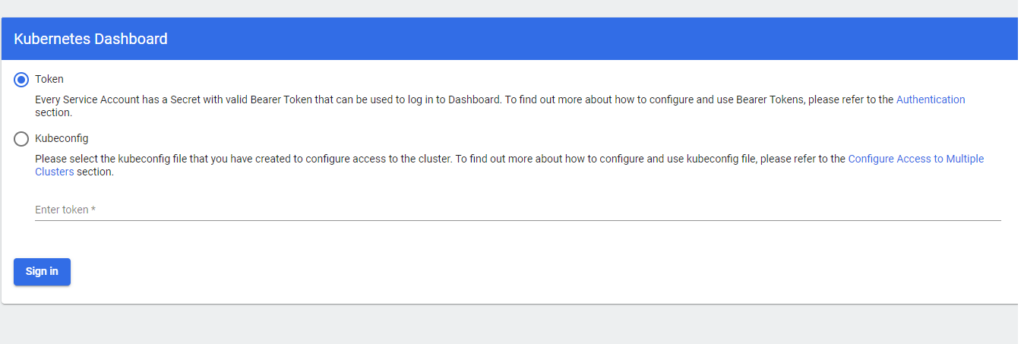
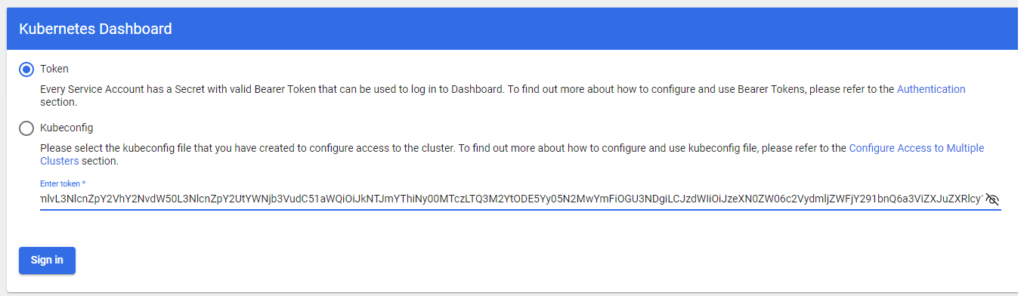
To access Dashboard go to the link in your internet browser:
It’s a localhost link that will open a web page, but from your computer, not from the Internet. The first screen is to log in. You have two options; Token and Kubeconfig. We will be using Token.
Back to the Github page, go to Create An Authentication Token (RBAC) to create a dashboard login sample user, and click on Creating sample user or on this link.

Now, it’s the time for most hard steps. However, they are the final steps to follow. The different point here is that you will experience creating YAML files. But don’t be scared; they are all prepared entirely for you. You need to copy and paste their content into a text editor, save it, and apply them.
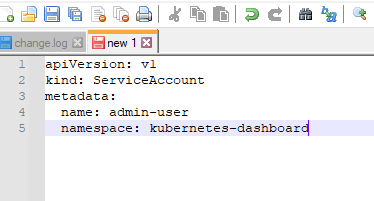
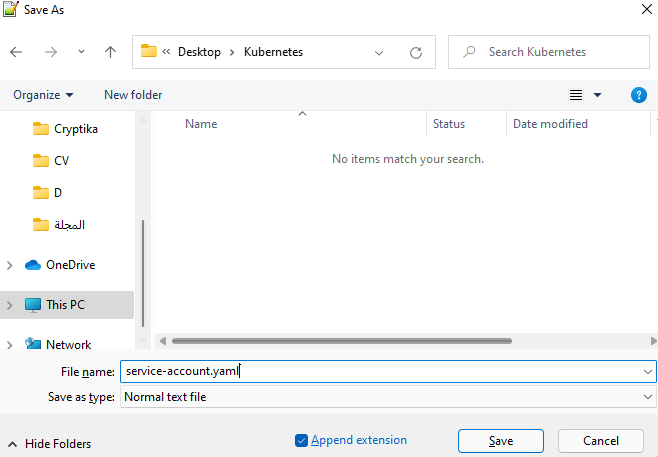
To create a service account YAML file, copy the below code content and paste it into any text editor. Then save the file by the name service-account.yaml. You can either save it in a new folder on your desktop or in any other path of your choice. You need to navigate to this file path in the PowerShell or command prompt to apply the YAML file.
service-account.yaml:
apiVersion: v1
kind: ServiceAccount
metadata:
  name: admin-user
  namespace: kubernetes-dashboard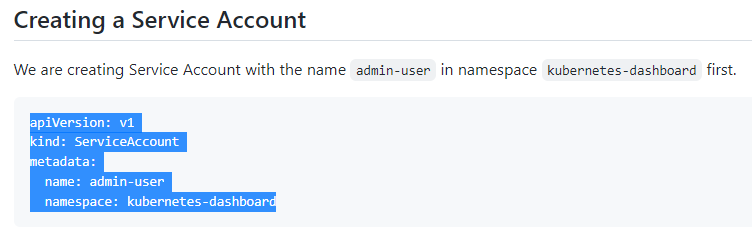
Open the PowerShell or cmd, go to the folder where you have saved the YAML file, and run this command:
$ kubectl apply -f dashboard-adminuser.yaml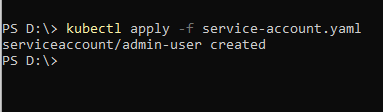
The next step is to create a "ClusterRoleBinding". In the Creating a ClusterRoleBinding section, copy this code content as in the previous time and paste it into any text editor. Then save it by the file name ClusterRoleBinding.yaml:
apiVersion: rbac.authorization.k8s.io/v1
kind: ClusterRoleBinding
metadata:
  name: admin-user
roleRef:
  apiGroup: rbac.authorization.k8s.io
  kind: ClusterRole
  name: cluster-admin
subjects:
- kind: ServiceAccount
  name: admin-user
  namespace: kubernetes-dashboard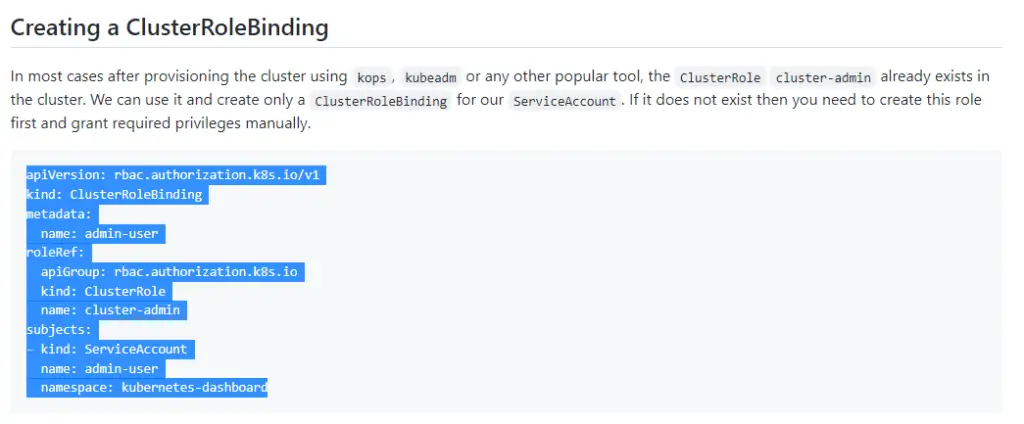
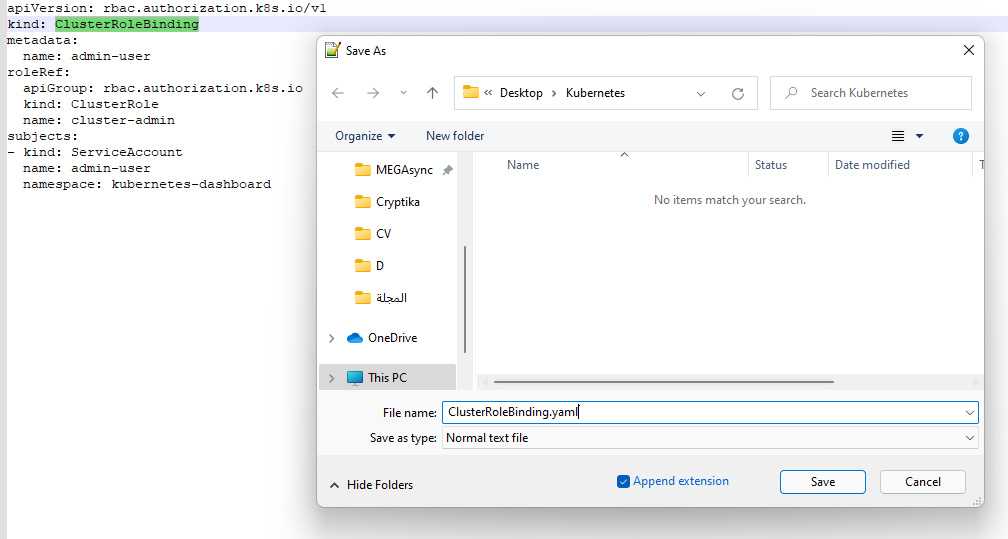
Now also apply it at the PowerShell as the following:
$ kubectl apply -f ClusterRoleBinding.yaml
Last but not least, get a Bearer Token by running this command:
$ kubectl -n kubernetes-dashboard get secret $(kubectl -n kubernetes-dashboard get sa/admin-user -o jsonpath="{.secrets[0].name}") -o go-template="{{.data.token | base64decode}}"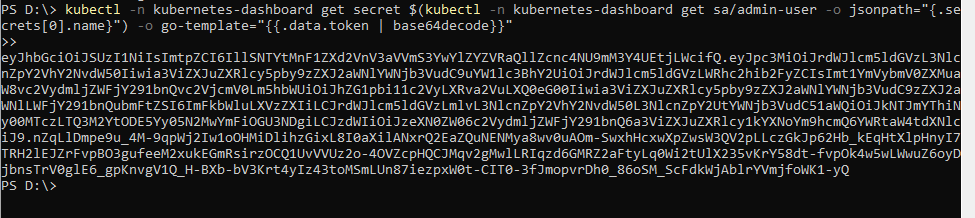
Now copy all this huge smudge of characters and symbols and past it in the empty Token box on the dashboard browser page, and click Sign in:
Congratulations! You have successfully logged in to your Kubernetes dashboard and become a new “Kubernetist”!